Surround Sound Setup Guide

Welcome to the Cables For Less

5.1 Surround Sound Set Up Guide

51-guide-1.jpg

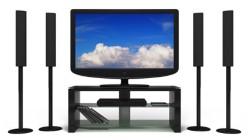
Are you looking to take your home entertainment experience to the next level? If so, there are many options and getting your bearings can be a challenge. Creating the right audio atmosphere will ensure you get the entertainment results you desire. Two popular standards for at home entertainment audio support are 5.1 surround sound and 7.2 surround sound- both options are guaranteed to transform your home theater. We at Cables For Less are here to help guide you through your setup process. Here, we will walk through the complete installation of a new home theater system with 5.1 surround sound, from your television and Blu-Ray/DVD Player to your receiver and speakers, offering selections from our catalogue for your cable connections and exploring your options to wrap up the project with a clean, professional look.

Putting together your entertainment experience will vary greatly depending on what type of equipment you have. In this guide we will be focusing on setting up 5.1 surround sound on current mid-market equipment, this will be your average new TV, speaker set, Blu-ray/DVD player, and receiver. However, there are many higher-end and lower-end options that exist and we will touch upon these along the way.

Before we hook up anything at all it is strongly recommended that you unplug all of your devices from electrical sources completely. This not only ensures the safety of your equipment; it ensures your own safety and the safety of your house and home.

Connecting Your Visual Input

Let’s begin by hooking up your Blu-Ray/DVD player to your television. This connection will establish your visual information feed only, your audio will run directly to your receiver and we will get to that shortly. You have a few options for visual connections; let’s explore them in this list which we have fashioned ranking from highest recommendation to lowest. It is important to note that our first two selections are capable of supporting the highest resolutions available, but your source materials (Blu-Ray or DVD disc) and the capability of your television itself will determine what you are actually able to view. For more information on picture quality, click here .

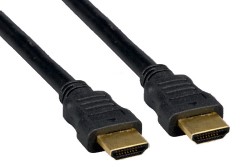
HDMI- For your visual connection, HDMI and Component cables tie for first on our list. Both of these technologies offer you outstanding picture quality capable of delivering up to 1080p resolution. Many people opt for HDMI because it is a single cable and offers a neater cabling situation, though it is worth noting to some that HDMI can run both audio and visual information and in this instance, you will only be utilizing visual. For a simple-to-connect solution at the forefront of current technology, HDMI is a fine choice, at a slightly higher price. Shop HDMI cables here.

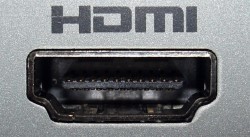
Connection Instructions for HDMI visual feed- One highlight of HDMI technology is the ease of connection. Here, you will simply connect one end of your cable to the HDMI port on the back of your Blu-Ray/DVD player to any HDMI port on your television. Note that if there are multiple HDMI ports on your television that you’ll need to toggle through HDMI channels to find the appropriate feed you are viewing, for example if your Blu-Ray/DVD player is in HDMI port 1, you’ll be viewing this player on HDMI channel 1.

51-guide-2-1-.jpg

51-guide-3.jpg

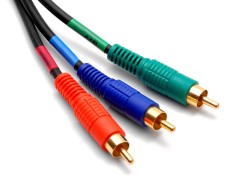
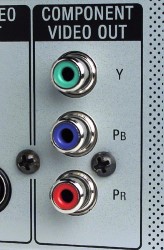
Component- Component cables represent a slightly less costly option than HDMI and are technically able to run the same high quality visual information. Component cables may look a little more familiar to some with their three prong connections, red, blue, and green respectively. If you don’t mind a little more wiring, Component cables can save a few dollars and still deliver the highest resolutions available. Shop Component Cables here.

Connection Instructions for Component cables- In this instance, we are using component cables for your visual connection exclusively, however many Component cables offer stereo audio support through traditional red and white RCA jacks. You’ll know a component cable with audio support because it has five jacks as opposed to three (the additional two are the audio). These audio jacks cannot support surround sound, so if you have component cables with audio support it is not a problem, just make sure you ignore the two audio jacks. We are looking at three jacks, red, blue, and green- simply connect these jacks into your Component port on the back of your Blu-Ray/DVD player and connect the other ends to your television’s Component ports, matching red, blue, and green connectors to ports.

51-guide-4.jpg51-guide-5.jpg

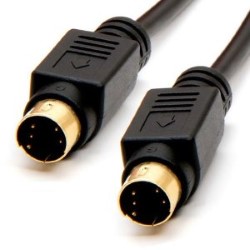
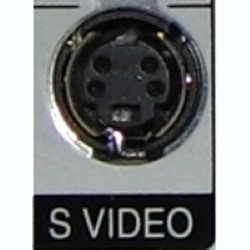
S-Video- As an outdated technology it is generally a good idea to avoid S-Video, using only if required by the source material from which you are viewing, which in this case would likely be a VHS tape or old camcorder. These technologies are unable to support surround sound of any kind, but do allow you to view some media that might not be otherwise available. Shop S-video here.

Connection Instructions for S-Video- S-Video technology is single cable and will run directly from your source device to your television, connecting at the characteristic S-Video ports.

51-guide-6.jpg

51-guide-7.jpg

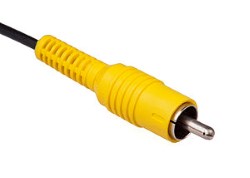
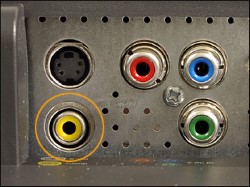
RCA- RCA cables represent the oldest generation of technology on our list and are only able to run resolutions up to 480i. We recommend RCA connection only if absolutely necessary and if visual quality and resolution are not important to you. Shop RCA cables here.

Connection instructions for RCA- RCA visual cables have single prong, yellow jacks. You’ll find a port on your Blu-Ray/DVD player of matching color and marked RCA, plug your cable in here and connect the other end to your television at its RCA port, again matching the color and labels.

51-guide-8.jpg

51-guide-9.jpg


Connecting your Audio Input

So, now that we have visual input taken care of, let’s begin setting up your audio! We’ll begin by talking about your receiver- this is the device that will serve as the control depot and central connection point for your entertainment center. We will be using your receiver to run audio from your Blu-ray/DVD player to your speakers. This means we’ll run audio information directly from the Blu-Ray/DVD player into the receiver and then run separate audio lines (speaker wires) from the receiver to your speakers. Because the receiver is central to your entertainment center it is important to understand what kind of technology it supports- you can determine this by simply identifying the ports on the back of the receiver. Look at your receiver to identify what kind of technology you can utilize and see the following list to decide which audio cable works best for you. For more information on receivers, click here .
 

Toslink- Toslink optical cables can carry an uncompressed lossless 2 channel PCM audio signal or compressed 5.1/7.1 surround sound. These cables are small, reliable, affordable, and fully support any 5.1 surround set up available. Because Toslink cables are optical, you’ll also be removing any possibility of creating ground loops or “hums” in your sound feed. Shop Toslink Optical Cable here .

Connection instructions for Toslink- Locate the optical port on your Blu-Ray/DVD player, this will likely be labeled “optical out” or “toslink”, connect your Toslink cable here. It is important to point out the unique shape of Toslink jacks, notice one side is straight while the remainder of the jack has a curvature to it- remember to align the straight side of your jack to the straight side of your port when connecting your Toslink to avoid damage to your equipment and/or cable. It should not be difficult to connect your cable, so if you find yourself having to exert substantial pressure, you may just need to realign your jack. Once you’ve connected your cable to your Blu-Ray/DVD player, connect the opposing end to your receiver’s optical port, these will typically be labeled “optical in” or “opt”. Many receivers have numerous optical in-ports, any one of these will work, just note that whichever one you choose has a corresponding “source” channel- when operating your receiver you’ll select the optical source into which you’ve connected your cable.
51-guide-10.jpg

51-guide-11.jpg

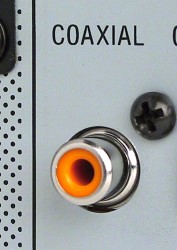
Digital Coaxial- Digital Coaxial cables are a popular selection and for our purposes can certainly get the job done. At a slightly cheaper price than Toslink, Coax cables achieve results of negligible difference in sound quality but also represent a technology with waning support from newer equipment. Shop Digital Coaxial here .

Connection instructions for Digital Coaxial- Locate the Coaxial out port on your Blu-Ray/DVD player, these will likely be labeled “Digital Coaxial Out” and bright orange in color, connect your cable here. Run the other end of your cable to your receiver, connecting at its Digital Coaxial in-port, often labeled “Coax In” and similarly bright orange in color. Many receivers will have multiple in-ports for Coaxial cables, any one will work, just note that whichever one you choose has a corresponding “source” channel- when operating your receiver you’ll select the coax source into which you’ve connected your cable.

51-guide-12.jpg

51-guide-13.jpg


Stereo Audio- These cables represent the oldest technology on our list and are not capable of supporting true surround sound. This means that if you use Stereo Audio cables to connect your surround sound system you will simply be running stereo sound through a higher number of speakers. We recommend these cables only if absolutely necessary due to technological restrictions. Shop Stereo Audio cables here .

Connection Instructions for Stereo Audio- Stereo Audio cables consist of two RCA plugs, they are color coded Red and White for Right Channel and Left Channel when used as stereo audio interconnects. Locate the stereo out-port on your Blu-Ray/DVD player, sometimes labeled “auxiliary”, and connect your cable noting the Red and White connections, then connect the opposing end of the cable into one of your receiver’s stereo audio in-ports.

51-guide-14.jpg

51-guide-15.jpg


Speaker Placement

Before we move on, let’s talk briefly about speaker placement. Speaker placement will essentially and quite literally shape your surround sound experience and because sound is a science, there is a plethora of information regarding speaker placement.
 

51-guide-16.jpg As a general guide, you will be placing your front left and right speakers to either direct sides of your television, your surround left and right slightly behind either sides of the audience, and your center speaker below or above of the television. Your sub-woofer will work finely closely placed near your entertainment center on either side you have space. For more detailed guidelines and information about speaker placement, click here .


In-Wall Wiring, Wall Plates, and Cable Ports
 

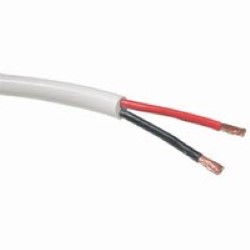
In-wall wiring is a great way to give your entertainment center a clean, professional look. Rather than running wires all over your living room, this option allows you to run speaker wires through your walls and emerge near your speakers via wall plates . If you do decide to run in-wall wiring it is necessary to use special in-wall speaker wire to ensure the safety, durability, and legality of your installation. In-wall speaker wires come in assorted varieties, two considerable variations are 2 conductor and 4 conductor. 2 conductor wires can be thought of as an in-wall version of any standard speaker wire- good for one speaker, while the 4 conductor is a little more versatile. Because 4 conductor wires have four wires they can be used to run audio to two separate speakers, support 4-channel speakers, or utilized for peripheral devices such as separate volume controls. Many folks opt for the 4 conductor wires to connect their surround speakers with less wiring. Shop In-Wall Speaker Wires here.

2 Conductor

51-guide-18.jpg

4 Conductor

51-guide-17.jpg

Mud Ring

51-guide-19.jpg

5.1 Surround Wall Plate

51-guide-20.jpg

Wall Plates- If you elect to utilize in-wall wiring for your entertainment center, wall plates allow you to finish the project with clean and professional presentation. These plates look very similar to any standard electrical jack but provide jacks for nearly anything you desire; in this case we would be using a plate made specifically for speaker cables. Wall plates are also installed in your wall just like any standard electrical jack and in a very similar process; you begin by choosing where you would like to place your plate, cutting your hole, and installing a mud ring as an anchor for your wall plate, ensuring its stability. Once your mud ring is in place, the wall plate fits over the top and you have a clean connection point for your speaker wires. To shop Wall Plates click here .
Cable Ports have become more prevalent with advancements in flat screen and projector technologies; as televisions themselves have begun to take up less space and it has become viable to actually mount your television to the wall via wall mount and as projectors have taken the place of the television in some homes, it makes sense that people want a discreet way to run their a/v cables from these devices to their receivers. This is exactly what cable ports provide, you can think of them as a different type of wall plate simply designed for in-wall runs of all of your a/v cables. If you are thinking about mounting your television or if you have a projector, cable ports are a great way to complete the presentation. We offer a variety of high quality cable ports and wall mounts in a variety of shapes and sizes. To shop Cable Ports click here . 51-guide-21.jpg


In-wall wiring is a do it yourself task of moderate proportion and can be a fun and fulfilling project if you have the experience and working knowledge, however if you are not comfortable with a project that involves drywall cutting and working with electric wires, we recommend you hire a professional to get the job done.


 And remember, if in-wall wiring is not the right choice for you, we also offer a variety of Cable Management Solutions such as cable clips and ties to clean up your cable runs, take a look at our catalogue for alternative solutions.


Speaker Wire and Speaker Connectors

Now that we have audio information running to your receiver and you have thought about speaker placement and in-wall options, we need to push audio out to your speakers with some speaker wire. Two important considerations with speaker wire will be the gauge (thickness) of the wire and your connection types.

Gauge- will directly affect the quality of sound being carried to your speakers, depending on the power of your speakers, the distance you will be running your wire, and the level of detail you are seeking in your audio experience, you will need a certain gauge. For high power speakers, longer wire runs, and super high quality sound, thicker gauge is required. For home entertainment purposes we recommend 14 gauge, it strikes a nice balance between wire that is too thin to support your surround sound experience and wire that is so thick that it becomes inconvenient.
However many gauges do exist and the decision is ultimately up to you. The table below gives suggestions for wire gauge in relation to the power of your speakers and the distance you need to run your wires. To learn more about speaker gauge, click here .
To shop standard speaker wire, click here .

Wire Size 2 Ohms 4 Ohms 8 Ohms
22 Gauge 3 Feet 6 Feet 12 Feet
20 Gauge 5 Feet 10 Feet 20 Feet
18 Gauge 8 Feet 16 Feet 32 Feet
16 Gauge 12 Feet 24 Feet 48 Feet
14 Gauge 20 Feet 40 Feet 80 Feet
12 Gauge 30 Feet 60 Feet 120 Feet
10 Gauge 50 Feet 100 Feet 200 Feet


If you are purchasing Speaker Wire from us, we can label the wires themselves or provide custom made labels, making your wires easier to install and use. Just give us a call when completing your order. A small additional fee will be charged for wire labeling.


Connectors and Speaker Terminals- Before we actually connect speaker wire from your receiver to your speakers let’s first decide whether or not you would like to add connectors to the ends of your wires. Generally speaking, using Speaker Connectors over raw wire will create more solid and accessible connections, lengthen the life of your wires, and prevent potential short circuits. While connectors are certainly not necessary we strongly recommend them as they may just save you considerable trouble and grief in the future. As you are considering Speaker Connectors, remember what type of speaker terminals your receiver and speakers have to ensure compatibility. There are two types of speaker terminals, spring clips and binding posts- both accept raw wire, but if you decide to opt for connectors remember that spring clips can only receive pin connectors, while binding posts can receive all listed connection types. Take a look at our list of available Speaker Connector options below and decide if any look right for you.

Binding Post Terminal

51-guide-24.jpg


Spring Clip Terminal

51-guide-23.jpg

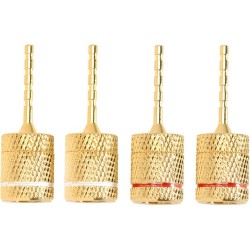
Pin Connectors - are easier to work with than bare wire, and they fit securely in spring clips or binding posts. Shop Pin Connectors here . 51-guide-25.jpg
Banana Plugs - are a popular choice, they plug into the middle of a binding post, giving you a solid connection. Shop Banana Plugs here . 51-guide-26.jpg
Spade Connectors- offer a sturdy connection and fit in behind the red or black collar of most binding posts. Shop Spade Connectors here . 51-guide-27.jpg
Raw wire- is slightly cheaper as you will not have to purchase any connectors for your wires but ultimately creates a speaker connection that is more susceptible to wire damage, lower sound quality, and short circuits. Shop Speaker Wire here . 51-guide-28.jpg


Connecting your Speakers to your Receiver

So, with all of these considerations and decisions behind you, actually connecting your speakers is fairly simple. Regardless of the selections you have made with the above variables, you will ultimately be connecting five speaker wires to five speakers, and running an additional and totally different, sixth line for your sub-woofer (we will get to your sub in a bit).

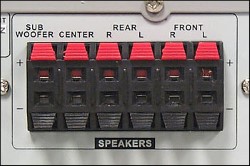
Your receiver should have a clearly labeled set of out-ports for your speaker wires. Often this area will be labeled “speaker system” or simply “speakers” and it will be easy to spot by its characteristic terminals. Note that each speaker terminal corresponds with a specific speaker- this is crucial in your surround sound results as each terminal will be sending different bits of audio information to each speaker in order to create an immersive soundscape. 51-guide-29.jpg

It is a good idea to label your wires before you begin connecting them, assigning each of the two lines in your wire as positive or negative and assigning the wire itself to a speaker- speaker connectors, markers, or label makers work great or, if you are purchasing your wires from us, call in your order and we will label your wires for you or provide labels at a small cost! Notice that your terminals are each assigned to a speaker, generally you will see “front left, front right, center, surround left, surround right, and sub-woofer”, if there are additional terminals to these six they are designed for other kinds of audio set up and you needn’t worry about them. Now simply select one of your wires and connect it to its appropriate terminal, e.g. if you are hooking up your center speaker, connect the wire at the terminal marked “center” and connect the opposing end of the wire into your center speaker.


One important aspect of connecting your speaker wires is to ensure you are connecting the positive and negative lines into their assigned ports on both sides of your connection- standard speaker wiring has two lines in one wire and these lines are actually identical but it is extremely important to make sure that the line connected in the positive port on your receiver is connected at the positive port on your speaker and the line connected to the negative port on your receiver is connected in the negative port on your speaker. This is where our above mentioned labeling or connectors can save the day. Repeat this process with your remaining four wires.


Finally, we connect your sub-woofer. Subs handle frequencies too low for standard speakers to emit and because they are dealing with such different ranges their wiring is necessarily different. Luckily this difference makes for a very simple connection. Your sub requires a specially designed one-prong, RCA style jack meant for broad frequency ranges. Your receiver will have one in-port typically labeled “sub-woofer”, remember this port is RCA style and so looks totally different than your other speaker ports. Connect your sub-woofer cable here and run the other end of the line directly into your sub. Shop Sub-woofer cables here . 51-guide-30.jpg

51-guide-32.jpg


Now it is time to step back from the project and take a deep, satisfied sigh of relief. You have created a home theater experience for you and all your guests, congratulations and enjoy.

And pass the popcorn.

51-guide-31.jpg

Do you still have questions regarding your surround sound system connections, speaker wires, or cable connections of any kind? Give us a call at (800) 273-9556. Our team of locally based professionals is available to answer any questions you may have Monday through Friday between the hours of 9 AM and 5 PM Eastern Standard Time. Contacting us is always totally free of charge, and we will be sure to get you headed in the right direction with all of your cable connection needs! If you prefer, you can also contact us via e-mail or fax.